|
|
Jewelry Tutorial - Carving Wax Egrets / Cameo
|
|
Wax Carving - Egrets |
|
|
| I start this
tutorial off with wax carving an Egret. I want to carve
a cameo of about 30mm by 30mm for use in future picture
pendants. So I am going to carve it, then cast it into
silver, finish the master, vulcanize it and inject it
for future use. This part will concern itself only with
the wax part and wax in general. These pictures
are no Geographical quality (grin) but they hopefully
will get the message across. Also, this is how I do it.
There are many, many other ways of achieving the same
result and some that are probably better than mine.
However this is what works for me. Any comments and
questions can be e-mailed to
hans@meevis.com (that's me)......
Click the link if you wish to subscribe to our
Newsletter on our latest Jewelry Tutorials and Tool Tips . We send them out about 4 times a year.
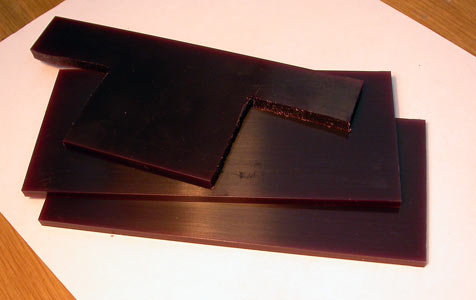
I
like Ferris or Matt purple wax. I buy it in sheet and
block form from
www.riogrande.com All the tools I shown are by and
large handmade, but Kate Wolf sell excellent sets of
tools. |
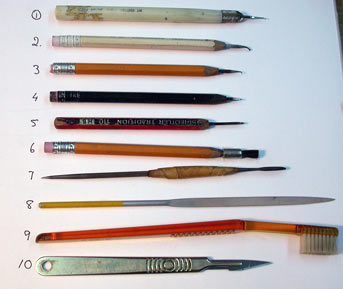
| These are the ten top
tools I use. The first four are pickers with
pictures below. Number five is just a pin for heating to
build up wax, no. 6 is a bristle brush, no 7 is a
riffler file that has been bent (pic below) no. 8 is a
Barrette needle file and no. 10 is a scalpel. I use
pencils as permanent holders, and then I spray then
different colours, so white are always ball frazers of
various thicknesses and black are always tapered points
of various thicknesses, etc,etc. Make finding the things
easier when they are all in a pile and you are on your
3rd glass of wine! (Grin) |
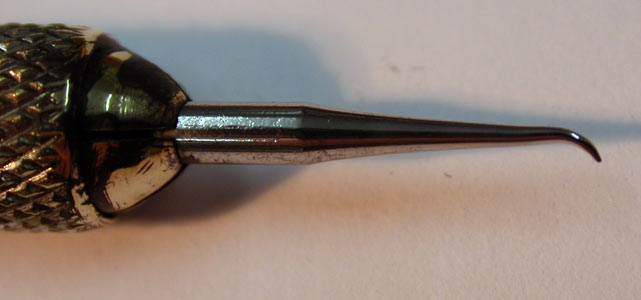
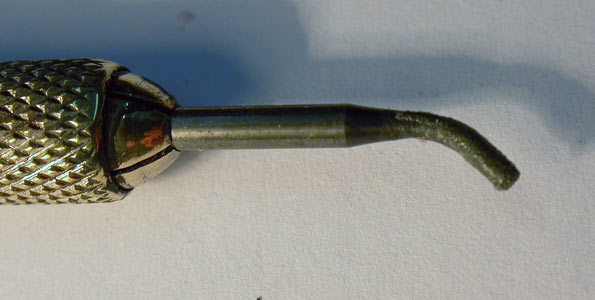
| This is the picker. This is my most
useful tool of all. It is simply an old burr that I
ground to a point and heated it up to soften and bend
it. Then I polish it up. I have various types of these,
and they go into a pin vice. |

| This is a Riffler file, which I heated
up with a torch and bent upwards. Very handy, and since
I onl file wax with it, there is no need to re-harden
it. |
| A dental diamond bur, also heated
up and bent. I have various shapes of these. |

| A bent ball frazer, probably my second
favourite tool next to a pick. |
| So now we come to the actual start of
things. The subject is a White Egret, a bird common in
Botswana and where I took the picture. After I sized the
picture in Photoshop I printed it out. Exactly the size
I wanted. I also printed out the picture in full size
and, for that matter I have MANY other pictures of the
subject that I am carving stuck up around me. Never
carve from memory alone. |
| So here I have used masking tar to
stick my small picture onto the purple wax. Nice and
flat and neat. I used to use clear adhesive as well and
sometimes I still do but it can seep through the paper
and cause some loss of clarity. Now I take my scalpel
and cut through the paper and into the wax, leaving a
thin line |
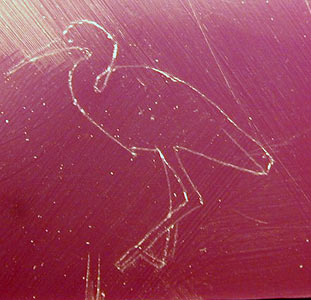
| Like this--- birds are easy, but were I
to do a face or something more defined, I would
obviously put more lines in. Not to many though, because
otherwise they become confusing and you get lost. Now it
is tine to use tool no 1 the bent, polished pick. The
thin one first... |
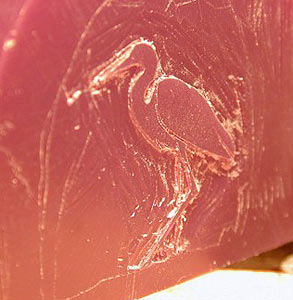
| Like this. Here I am defining the shape
and carving the background away. As ol' Leo said, I am
removing all the stuff that doesn't look like an
egret... |
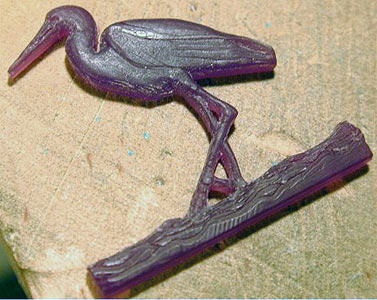
| By now I have removed quite a lot and I
am starting to look at the thickness of the final piece.
I want about 2-3 mm. When I have the right thickness,
then I file the back away, toward the egret, until the
surrounding wax becomes transparent. Then it is easy to
cut the remaining wax away, using tool no1, your pick. |
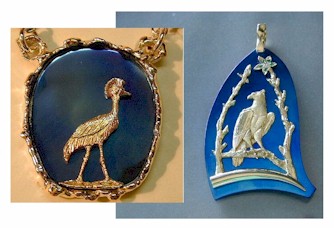
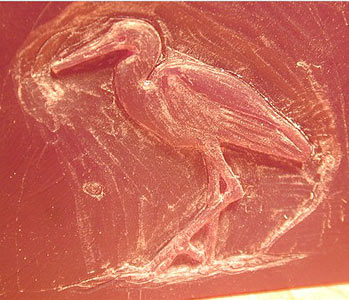
| Like this.. Now I sprue it up and cast
it using a centrifugal caster. Once I have it cast,
normally in silver that is mixed in a 97% alloy (because
it casts easy and is easy to engrave) I will then
re-sprue and vulcanize for mass production, should that
be the need.. Below is a typical pendant where I would
use this type of product. I have sold the first egret
pendant that I made so I am showing my Fish eagle one.
Anyway, you get the idea... |

| This ends the "How I do it". I hope is
was clear enough. The Jewelry
Tutorial on Basic Spin
Casting will show you how to cast your wax model. If you have any questions or wish to be notified of any new tutorials that are posted,
email me at hansmeevis.tutorials@gmail.com
Even though this is a free Tutorial, there remains a contractual obligation to the
intellectual property of Hans Meevis. It is not permitted to copy this tutorial content in any manner whatsoever,
be it in print or otherwise, nor be published online regardless as to whether a back link is included. |
|
|