Online Jewelry Training Classes for Metalsmiths

I was once in Cape Town, in South Africa, and in the window of a jeweler there was this ring that had a circle of diamonds that spun around.
Totally fascinating, this kinetic jewelry type of thing.
I wanted to make something like that. So I hunted down some small ball bearing races, and in my spare time, I concocted my first spinning ring. There were many uncertainties. The bearing, ( will it last, rust, seize? How does one fit it into a ring?
Anyway, I made my first ring and Anne, my wife, took one look at it and 'annexed' it. Okay, I figured since it was an untried design, and if it died, hey, no problem, my wife will forgive me. It lasted for nearly five years and only then I had to replace a locking component that held the bearing in.
I thought the bearing would have failed before, but ten years later she is still wearing her treasured ring.
So this tutorial is about how I made the second ring. There are, of course many other ways of doing this job. It all hinges on the type of ball race you are able to obtain. Stainless steel for one, and the smaller the better.
This free tutorial follows the same format as all my other free and premium tutorials. This gives you a good insight into the technical teaching methodology.
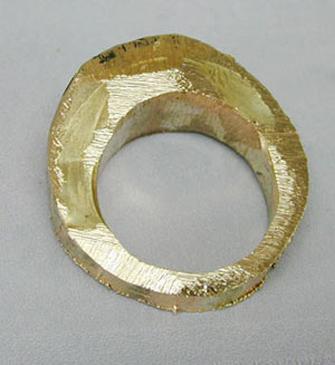
I start of with a thick solid piece of gold and file it down.
Then I put it in a hand vice and drill the 7.5 mm hole in the top of the shank on my drill press.
A bit wasteful, but it gets the job done quick.

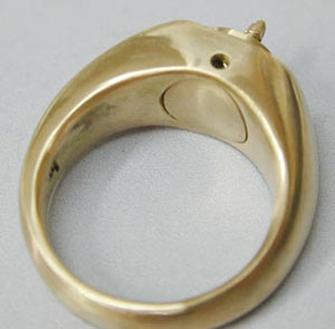
Here the top is drilled down and the ring has it's basic shape.

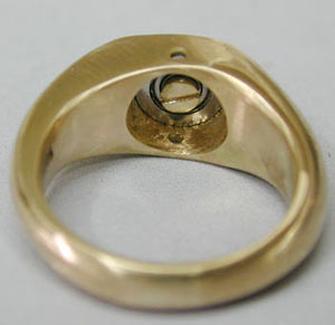
Then I solder a jump ring into the hole I have drilled.
At the right height from the top, nice and level.
This is where the bearing will fit in.

Top view.
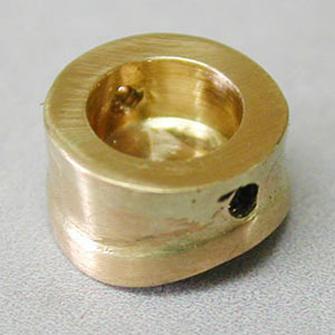
The jump ring I soldered in stands a little bit proud.

This is the 2 mm center screw that will hold the top stones and bottom carriage in place.

A 6 mm sealed bearing with a flange.
I bought these from
http://www.smbbearings.com
Which goes in like this.
So the flange of the bearing locks up against the broad jump ring I soldered in in Image No.3.
I cut the key way of the screw with a No.2 saw blade.

And this is a close-up of how the bearing sits.
I made this cover washer that is going to hold the bearing in and be screwed in position from two sides.
It fits into the ring from the bottom.

Once the washer is in place, the tiny 1 mm screw is screwed through the side of the ring and into the cover washer.
The cover goes in like this and then the little screws hold it and by default, the bearing, in place.
So now we get to the 'spin' of the thing.
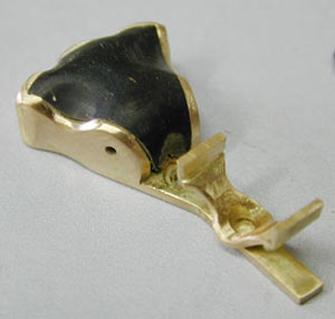
This is the arm.
The black coral is carved and fitted and two holes are drilled into it through the sides to fit two more screws that will hold it in place.
The collet is roughly made.
The center hole of the arm is also threaded.

Underneath I pierced a little shape of a jumping dolphin, just to add some extra decoration.
The thread can be seen of the center hole.

The center collet doubles us as a screw as well as a stone holder.
Since this is the main 'nut' that holds everything together, it can not be allowed to unscrew at all.
So I soldered a protruding 'bubble' onto the bottom of the collet.

So as the sapphire collet is screwed down, the locking bump 'clicks' into the indentations on the bottom of the arm.
These indentations are made with a ball frazer.
This locks it into place in a most secure manner.
Notice the two screws that are holding the black coral in place.
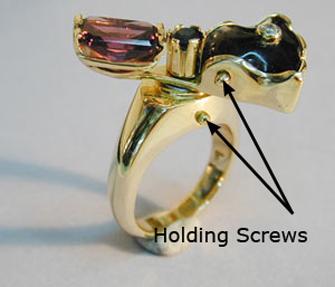
Here the ring is assembled.
The diamond in the coral is preset and then press fitted into the coral.
The two little small screws hold the cover washer in place and the bearing as well.

These are all the various components.

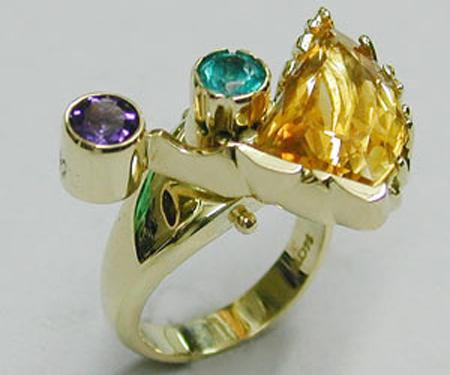
The completed spinning ring with garnet and coral
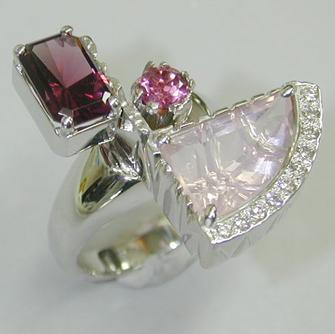
Another examaple of a spinning ring with rose quarts
Click the link to receive your free PDF version Make a Spinning Ring which is emailed to you within 4 - 12 hours.
or select other projects from Jewelry Making Tutorials List
If you have any questions or wish to be notified of any new tutorials that are posted, email me.
This content is the intellectual property of Hans Meevis. More information on our Copyright and Privacy Policy


