Online Jewelry Training Classes for Metalsmiths

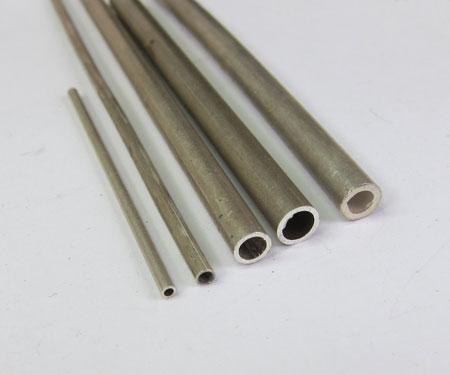
Making tubing is an important skill that is necessary in goldsmithing. Whether the tubing is used to make a hollow article, hinges, or sections of bezel for setting gemstones, the ability to make different diameters and wall thickness's of tubing will stand any metal worker in good stead. It is possible to work only with commercially made tubing in a jewelry workshop, however, making specific tubing, with specific wall thickness's and diameters gives the workshop far greater flexibility. The one disadvantage with workshop- made tubing is that is has a solder seam, whereas factory made tubing does not. However, if the seam is made correctly, this is a very small disadvantage. In this tutorial, I will use silver, but my method applies to all precious metals commonly used in the trade.
This free jewelry tutorial follows the same format as in the paid for pdf jewelry tutorials. This gives you a good insight into the to technical teaching methodology.


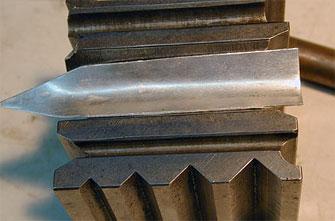
I start with a piece of metal rolled to the correct thickness I want. In this case I started out with .6mm. The metal walls will thicken up slightly when the tubing is finished, but not so that it is a cause for concern. The sides of the flat piece of metal are completely parallel, and it is cut to a point to make the first draws through the drawplate easier.


Once the one side of the metal is flat, I use a divider to scribe the correct width. This will then be cut parallel to the flat side. I determine the width by multiplying the wanted diameter tubing by 3.14, and then adding 1.5 times the metal thickness. I make the diameter that I want a bit larger than my final size, because I am going to draw the tubing to the required diameter. I always try to make a bit more tubing than I need so as to have some stock in reserve.

Then I put it in a swage block and bend it roughly round using an appropriate mandrel.


I continue to do this, using a thinner and thinner mandrel until the two sides meet.


Before the tubing is soldered closed, I pre-draw it through my drawplate to get the sides nicely closed. Then I anneal it and draw it through the same hole again. I do this, because when the metal is drawn and bent it slightly work hardens. Then, when I anneal it, the seam will pull apart slightly. One pull through the last hole tightens it nicely again in an annealed state.


Nicely closed and ready for binding wire and soldering. A good practice is to use your scriber and score it down the seam gently before you solder. This scratch brightens the metal at the seam, allowing for a cleaner solder joint.


Now I bind binding wire around the tube to further prevent it from opening during soldering. Always use two twisted strands of wire. It allows for more even tightening and less expansion when heat is applied


I use a flame like this to solder. Just a hint of yellow makes for a slightly bushy reducing flame. I use a No6 nozzle


Soldered. Now I will use a fine file to file any excess solder before I draw it down further.


I then solder a piece of wire in the piece of tubing if I want to draw it down to a thinner diameter. Should the wire need to be thinner, I roll or file it thinner. The total time that it takes me to get to this stage from melting the original metal in the plate ingot, is half an hour. Tubing can be used in these Jewelry Tutorial - Making a Fold-Over Catch and Making a Bayonet Catch also advanced used in How to Make Composite Metals.
Click the link to receive your free PDF version of this tutorial on How to Make Tubing on the bench, which will be emailed to you within 4 - 12 hours.
or select other projects from Jewelry Making Tutorials List
If you have any questions or wish to be notified of any new tutorials that are posted, email me.
This content is the intellectual property of Hans Meevis. More information on our Copyright and Privacy Policy