Online Jewelry Training Classes for Metalsmiths

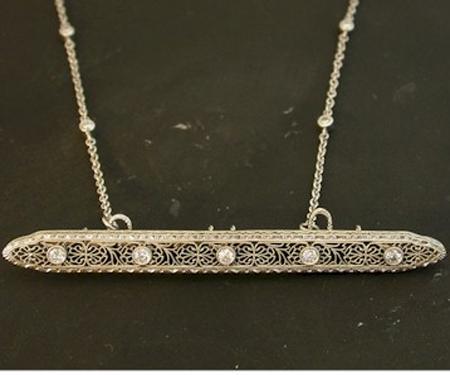
This was a custom commission where I had to make tiny white gold tubes and join them to a fine 18k chain. The chain design had to fit in with the brooch to form a unified look.
The brief was that the brooch remained a brooch but also should be worn as a pendant without any invasive work on the brooch.
This is an antique brooch. The brooch is circa 1920 and is a stunning example of really fine filigree work.
This is certainly not the only way to make little tubes. One can hand hold and solder as well, but I chose this method because it is more accurate and more consistent. These pictures were taken 'on the fly' so the burrs and scratches were all removed afterwards.
This free tutorial follows the same format as all my other free and premium tutorials. This gives you a good insight into the technical teaching methodology.


The concept:
I engraved white gold tube through which the pin of the brooch slid and clicked closed.
The two little "loops" behind the chains in the picture were to ensure that the brooch does not fall forward and to hang the chain from.


Making Diamond Bezels:
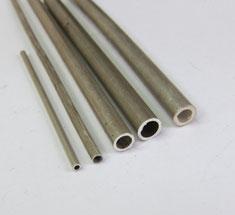
First, I draw the right diameter wire (make your own wire). In this case, I was going to set .05ct diamonds, so the tube was about 3.23mm, since the diamonds are about 2.5mm in diameter.


Next, I drill a .5mm hole through the wire. This is done at just about the culet point of the stone to be set in the wire, that will be drilled out later.


I widen the hole a little bit to accept the jump ring so that it sits nice and flush before it is soldered in.

The little jump rings were so small that I modified a double round set of pliers so that they could bend really small diameters.


Using the pliers to bend the jump rings like this.


These are the un-soldered jump rings. They're not really jump rings, but you get the drift... Now you can see why I used a barrel frazer to make the hole larger for a flush fit .....like counter sunk. (Refer to Image 4).


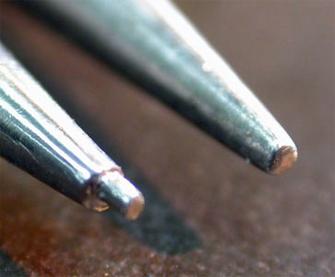
I put the white gold wire into my soldering tweezers. It just so happened to fit.


That's one side soldered. Careful flame control.


The next picture shows a bad solder joint. I rejected that one because if you solder correctly you have nothing to finish off.


Now I drill the center with a .7mm and then a 1 mm drill. Then the right size ball frazer, so most of the metal is removed . This makes the final shaping much easier when you ready to set. I also drill before I cut them off--much easier to hold


Sawing through the wire, being careful not to saw higher than the hole I drilled, because most of these tubes have closed backs.


Here you see the size of the parts. It is better to keep the bezel back closed and then bright engrave it, otherwise you see a black dot when the chain twists. This is very noticeable. The jump rings were used to join the tubes to the chain, which was 18ct white gold.


I took two pieces of nylon and drilled a appropriate size hole so that the clamp holds the tube without distorting it. And of course so it does not slip out when the tube it is being pushed over when setting the diamond.


This is the rough unfinished bezel being prepared setting.


The back part being bright engraved.
The rest of the work was simply cutting the chain to the right lengths, joining them with the jump rings shown above and then soldering them closed.
In soldering, I used a little torch with a No3 sapphire nozzle. That's a tiny flame and a bit of a mission to keep alive with Oxy-gas, but that is more accurate soldering and less chance of melting everything.


This is the 18k chain dotted with diamond set bezels. The brooch is circa 1920 and is a stunning example of really fine filigree work.
or select other projects from Jewelry Making Tutorials List
If you have any questions or wish to be notified of any new tutorials that are posted, email me.

This content is the intellectual property of Hans Meevis. More information on our Copyright and Privacy Policy