Online Jewelry Training Classes for Metalsmiths

Knowing how to make your own collet stock is an important skill that is necessary in goldsmithing. If a non-standard gemstone size passes over the bench or speed is of essence, you will be able to make your own crown collet. Or perhaps you are asked to make a collet in a metal alloy that the supply houses do not stock, you will have the skill to make a four prong collet.
This free jewelry tutorial follows the same format as in the premium pdf jewelry tutorials. This gives you a good insight into the to technical teaching methodology.


We start with a metal strip.
It depends on how big or small the collet must be.
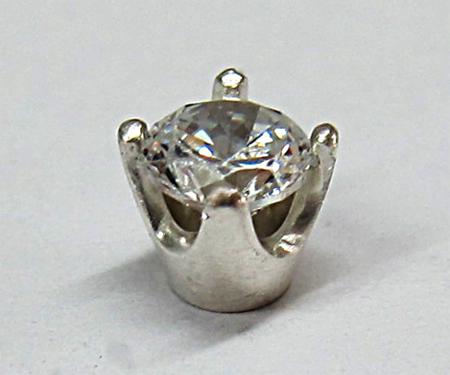
In this case I am making a collet for a one carat diamond, which is a stone about 6.5 mm in diameter.
The metal is fully annealed and in this cast about 7mm wide and 0.8mm thick.
Again the thickness of the metal can vary from 0.5mm to 1mm. It really depends on whether you want a thick and strong collet or one that shows less metal.


First I make a tube, which I solder with hard solder. In any smithing operation, it is always good to try and use the hardest solder that can be used. The reason is because the hard solder contains the least amount of alloy and is so more hard physically and also closer to the colour of the parent metal. I make it so that the girdle of the stone that the tube is being made for, is halfway between the inner and outer side of the tube.
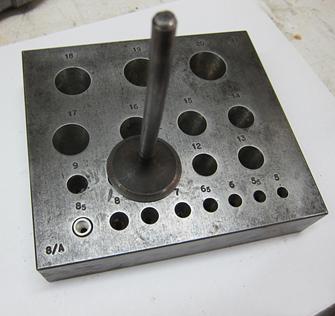

Once the tube is nicely round and the solder joint is sanded down smoothly, I put it into my coning block and use a old car valve to shape it into a cone. The coning block is a 17 degree one. One can get different angles, but 17 degrees is the standard for jewelry. Carefully and straight until it is flush with the top of block. A car valve is a cheap and easy tool to acquire and use. Plenty at your local garage.
Always anneal the hammer side of the valve. Valves are made out of hardened steel and the unannealed tip can shatter and cause eye damage.
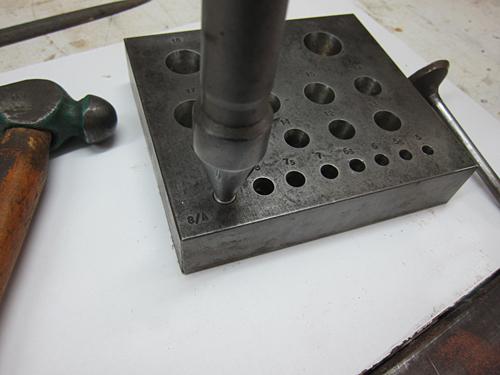

Once the tube is flush, I normally anneal it and then I use the coning punch to spread it out into the 17 degrees needed. Generally, the annealing allows the metal to spread without the solder joint splitting.
If to much force is used and the solder joint splits, the collet is ruined and it is best to start over.
Note: The coning block is also called a bezel block in the USA.
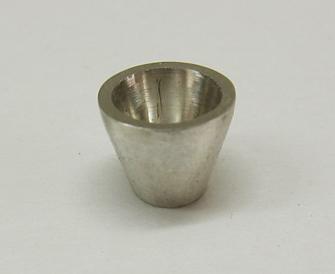

Done, all neat and sanded down.
Now comes the time for working out the claws.


Now I use my piercing saw to mark out equal divisions by making a small cut.


Then I saw down to about two thirds of the height of the coned tube. This is approximate, and the depth of the cut can vary according to the design of the final piece.


Then I use a 1mm barrel frazer to follow the original saw cuts. If one uses a saw cut first, the frazer in inclined to follow the cut and so wander less to the sides and thus give a straighter line.


I use a round needle file to expand the slots. This is the time that the exact depth will be determined, and the precise 90 degrees on the cut will be made.


Here are the tools I use to get the collet to agree with me. Flat round pliers leave no marks. Round and oval needle files to develop the angles of the four claws. And a straight 2.3mm sanding mandrel to sand away the file marks. First 220 grit and the 1200 grit.


Until we are at this stage.
Now the collet is ready to be fitted into the ring or pendant.
Click the link to receive your free PDF version Making 4 Prong Collet which is emailed to you within 4 - 12 hours.
or select other projects from Jewelry Making Tutorials List
If you have any questions or wish to be notified of any new tutorials that are posted, email me.
This content is the intellectual property of Hans Meevis. More information on our Copyright and Privacy Policy


