Online Jewelry Training Classes for Metalsmiths


This is a short tutorial on how to make a traditional six claw collet without any jig or Plaster of Paris or wax. In this tutorial the photo's were taken on my bench and are 'as is' :)
In the 'old days' I used to make collets only in this manner. Then along came the supply companies, and the art has much disappeared.
They are not difficult to make however. This is a very useful skill to have for any metalsmith. The reason being that if there is an urgent job, it takes about 30 minutes to make one of any imaginable size. Ordering one from the supply companies would take much longer and only be available in selected sizes.
You have more design control when making your own six claw collets by changing a few elements like the height of the collet. This creates a custom feel for your setting.
This free jewelry tutorial follows the same format as in the paid for pdf jewelry tutorials. This gives you a good insight into the to technical teaching methodology.


I start off with annealed wire, about 0.7 to 1mm in diameter, depending on the stone size.
I cut three pieces about 30 to 40mm long and I mark the center with a divider.
Then, with my divider I mark the ends out from the centre and trim each end off. So now I have three pieces that have precise lengths from the center.


Then I file on the mark I made in the center of the wire with a 3 corner file nearly through. Never mind the swarf.....
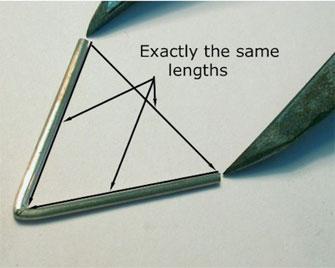

And I bend them so that the are exactly the same as the divider was when I marked the half of my wires. Remember, The circumference of a circle is six times the radius of that circle. Once I have all three of my wire bent equally, I solder each wire.


I put them together and solder all the 'V's together.


Notice that I have marked the "spider" with my divider at the black dots. This is to get the exact bending mark, as the next picture will show. now, one thing. The distance from the center of the spider to the black dots is determined by two things.
The first is the size of the stone the collet is being made for, and the second is the height that the stone will be set.
But as a rule of thumb, the marks will be about one and a half to two times the diameter of the stone. This becomes apparent in the next few pictures.


I take parallel jaw pliers and half bend the wires on the 'black' spots that I marked with my dividers in the previous picture.


Then I bend them all the way with a set of flat nosed pliers. Now is the time to get then all nicely equal and parallel. So now you can see, if you exceed two times the diameter of the stone, the collet will be more like the shape of champagne glass, and thus will set lower in the ring. A narrow collet will set the stone higher.


Once the wires are all nice and neat, they get soldered with hard solder.


And the top is cut off like this. A front end or side cutter is best. If you use a saw and the blade hooks, it will bend the claw out of line and then the collet could be ruined.

The stone should fit in at about this height.


Then I make a jump ring about the size in proportion to the stone as in the picture. I polish it. Then I cut with a setting burr (hart) a groove so that the jump ring "clicks" in. This is not easy at first, because you have to get the grooves level, otherwise your jump ring will not be level. If you are uncertain, mark at first with a fine sharpie (marker pen) and then start the groove with a 0.7mm barrel frazer held from the side. They tend to be more controllable than a setting burr. Then the inside of the collet is polished before jump ring is soldered in.
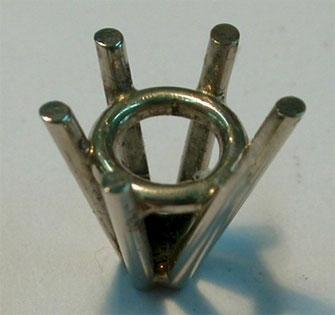

Like this. I will use a conical frazer to burr out the jump ring, so that the stone fits snugly.


To finish the bottom of the collet I use a sanding disk to cut away the original solder joint. Then I use a ball frazer to burr out the claws as shown. Care must be taken that the ball frazer goes not hook, because if it does, the claws will be bent and the collet will be out of true.


A jump ring is made and soldered in as shown. Note: first the swarf must be removed. After soldering, the jump ring is re-drilled so that the hole in the center is neat.


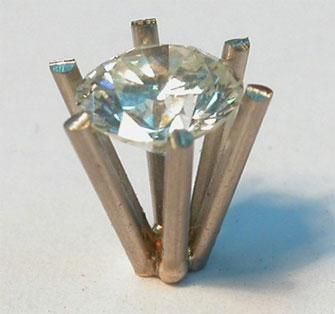
This is then the collet, ready for soldering into the shank. This shank was the customers, as was the diamond.


The ring ready for setting.
Click the link to receive your free PDF version Make a Six Claw Collet which is emailed to you within 4 - 12 hours.
or select other projects from Jewelry Making Tutorials List
If you have any questions or wish to be notified of any new tutorials that are posted, email me.
This content is the intellectual property of Hans Meevis. More information on our Copyright and Privacy Policy


