Below is the method that I used to make it.
Warning: Other than the picture on the right, all the other pictures were taken 'on the bench' and will not win any awards but they will give you the general drift.....
I call this composite compression work, because its not traditional Mokume Gane, nor soldering lamination of metals in respect that the metals are physically joined. They are not physically joined. They are simply compressed onto each other, very tightly, with the help of a drawplate and some serious muscle power.
This was me playing around with titanium, gold, silver and copper. By and large these metals give a profound color difference and therefore make for definitive and unusual pieces. I assume that the reader has the fundamental techniques of metal smithing down. That is, melting, rolling, forging, annealing and soldering and cussing and all that stuff....
Below is given the way it works for me. Keep in mind that your mileage might differ..
Any questions and feedback are welcome. e-mail me at http://hans@meevis.com.
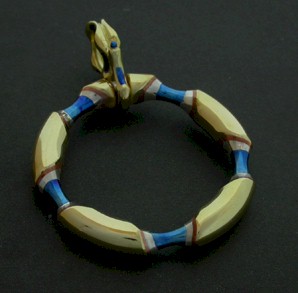
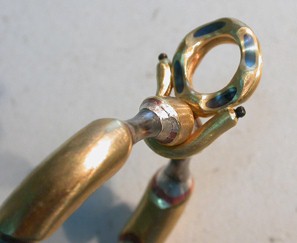
| This pendant is about 40 millimeters in diameter
and the tubing is 5.5 millimeters in diameter. The bail (the part where the
chain would go through) is loose and can spin around. The idea sort of follows the Mokume Gane thing, except that none of the layers
of metal are actually soldered or fused. Below is the method that I used to make it. Warning: Other than the picture on the right, all the other pictures were taken 'on the bench' and will not win any awards but they will give you the general drift..... |
|
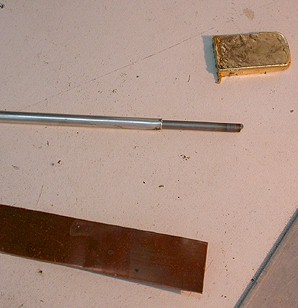
| The four components: Silver tubing with the titanium wire already inserted. Copper rolled out to be made into tubing. 18ct gold to be rolled out and made into tubing
|
 |
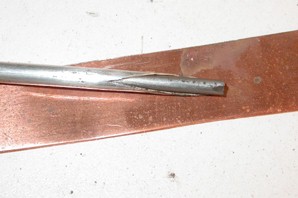
| The silver tubing is drawn around the titanium wire until it is tightly compressed. The titanium wire is 3 mm in diameter and when the silver is tightly drawn around the titanium, the 'wire' becomes very difficult to draw by hand, because the titanium is much harder than the silver and the titanium does not deform easily. |
 |
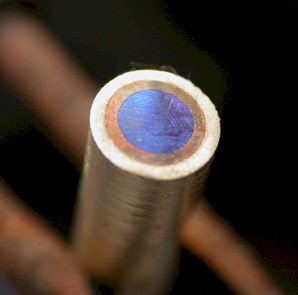
| Here is the reverse, copper around the titanium with silver
around the copper. This picture shows how tightly the various layers can be
drawn over each other. I blued the titanium for the photo These metals are not physically soldered or joined by heat diffusion, and that means that they can slide along each other when they are heated or cooled, as in annealing, and quenching. That makes for interesting soldering. This composite wire will be inserted into the 18 gold tubing and will be drawn down in the same manner . |
 |
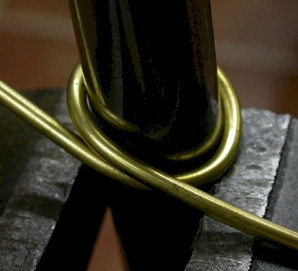
| Okay, so this is not the actual bending of the above piece but I wanted to show how the composite was made into a circle. A ring triblet, a vice and some man/women/person power.( We very politically correct here) |
 |
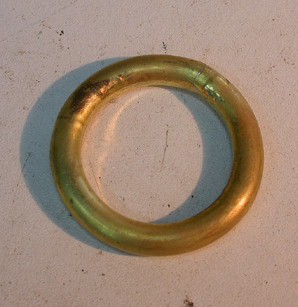
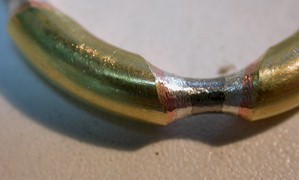
| This is the basic circle about 40mm in diameter composite
wire. The wire is about 5.5 mm thick, about as thick as I can draw
by hand. That is 18ct yellow gold on the outside, copper, silver and titanium
towards the center. I thought that I was going to get big wrinkles on the inside of the circle, what with the bending and though there was some, the wrinkles were small and easy to file out later. I annealed often (about seven times) and I made sure to follow a good piece of metal smithing advice "If you do not want a mark on your metal, do not put it there" The solder joint is at 1'oclock and 11'oclock is a photographic anomaly. |
 |
| After marking the equidistant points on the circle, I start filing inwards towards the center with a 3 corner needle file. |
 |
| Developing the piece, I use an oval needle file, working
towards an gentle inner curve. I heated the right hand side just to give me an idea what the titanium would look like when it is blue, so that the blue does not overpower the other colors. Blue and red are strong, silver and gold color are visually weak. |
 |
| Developing the "inside curve" of the design is difficult. Reason being, you filing away the gold, copper and silver all the time as you expose the titanium.. Keep in mind that the whole point of the project is to expose titanium in the middle, which will be blued later. The gold, copper and silver colors are simply there to enhance the color of the blued titanium. Blued titanium is the essential center focus of this piece, and is a strong color in a visual sense. |
 |
| The pendant is filed, slowly exposing the titanium I blued it as I went along so as not to loose the balance of color between the gold/copper/silver and titanium. |
 |
| The groove at 12'oclock is filed inward for the bail. Care must be taken, because if you file through the silver and into the titanium, the joint will be open, since the titanium cannot be soldered. ( the inner titanium ends are at 12'o clock) So the silver effectively holds the circle in one piece. At this point the pendant was sanded down to 220 grit and only needed to go down to 1200 and then to polish. |
 |
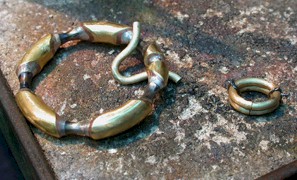
| Preparing the bail for soldering.
The next picture shows the titanium more clearly, however, the bail/awl was made out of titanium wire inserted into 18ct gold tubing. This was made the same way as the main pendant The two oval pieces will be soldered with hard solder |
 |
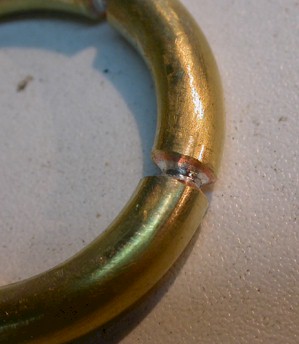
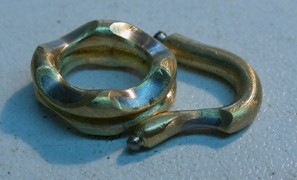
| A close up of the bail after the ovals were soldered. Care has to be taken when exposing the titanium, because enough gold 'skin' must be left to allow the solder to flow in between a gold to gold surface. It is not possible to solder titanium to gold with a standard oxygen/ gas torch.
|
 |
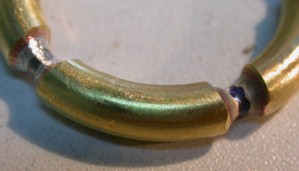
| A light touch is needed to solder the bottom to 'U' piece to
the oval top. I
used hard solder for this joint, BUT, be careful when soldering composite
pieces. For a heads up, check out 'Notes on finishing the pendant' below. Also not how the titanium has blued during soldering. That indicates that the bluing temp is about the same as 18kt hard solder. |
 |
| Notes on finishing the pendant: So the first thing I learnt, very clearly, was that when you solder with 18ct hard on a composite of gold, silver and copper, and the solder (18kt hard) has the same or higher melting point than any of the composite metals it will form an eutectic solution.. So as you solder, the silver/copper fuses and becomes a solution that has a lower melting point that the component metals. Then the stuff oozes out of the joint like lead solder and totally screws up the joint. Bah... Disgusting.... COROLLARY: When soldering composite pieces, use a solder that is lower than the lowest melting point of any component metal. ... for sure.............. Since the layers of metals are not actually soldered or fused, there remains a microscopic gap between them. When heating and quenching takes, place, contaminants ( like your pickle or bi-carb solution) are sucked into the gaps between the layers of metal. These ooze out at the next cycle of heating. That does not matter when the piece is being soldered on. However, when it comes to heat bluing the titanium, absolute cleanliness is essential. Steps to final finish. First 220 grit sand paper. Then 1200 grit. Then polishing paper. All done on the hanging motor with a split sanding mandrel. Then "Dialux" green which is a polish for harder metals. Careful, if your titanium is not perfectly smooth and you polish to long, the buff will 'eat' the softer metals and leave the titanium raised. Platinum polish also works and so does Tripoli. Various etching techniques on the different metals could also give interesting results in terms of texture and coloring. Then before bluing, a hard, hot rouge to brighten up everything . I use normal red jewelers rouge . So, after the piece has been sanded and polished I use the following sequence. I heat it up until all liquid has evaporated or oozed out of the microscopic gaps, and the pendant is dry and then I let it air cool. Then I clean all the residues off with the ultrasonic or alcohol or acetone. Then I heat it up with a bushy, soft flame, more and more, carefully watching for any spots on the metal that would tell me it was not perfectly clean. Perfect cleanliness is essential. If there is an imperfection,( say like a tissue hair, or a water mark) the color will not be uniform and its back to sanding, starting with 1200 grit, and the whole process starts again. A real schlep, so it's better to do it once, well. Once the titanium has reached the particular blue I want, I let it air cool. All the other metals have of course been oxidized by the heat, and those oxides are removed by pickling the piece in cold pickling solution Citric acid, dilute sulphuric acid are the ones I use, but I am sure others will work just as well. The acids do not affect the titanium color at all. Keep in mind that the blue is not resistant to heavy wear. It scratches relatively easily. That is the reason why all the blue sections are in the bottom. The other metals, being raised, protect the titanium from being scratched through general wear and tear. Then a light rouge which does not affect the blue of the titanium, and the piece is finished. All that is now left to do is to sell it! ha ha The camera used in taking the photo's is a Nikon Coolpix 4500. Also, you can use the pictures and information as you wish. If you give me credit, nice. If not, I really couldn't care less. I'm tired of people copyrighting dumb things like wedding rings and mokume gane pieces and then peddling these 17th century designs and techniques as if they have just invented them. I am sure that the above has been done before many times and I, as a metal smith, try to keep true to two saying that my Sensei hammered into me--- 1. Stay humble in what you do, no matter how good you think you are-- 2. There are always better and lesser people than you--know your place and be peaceful with that.. |
Variations of Composite tubing jewellery
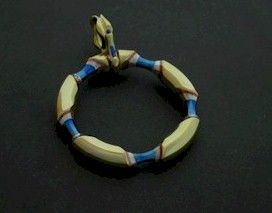 A unique composite metal pendant combining 18ct gold, Copper, Silver and Titanium A unique composite metal pendant combining 18ct gold, Copper, Silver and Titanium |
 18ct. gold ring and titanium centre 18ct. gold ring and titanium centre |
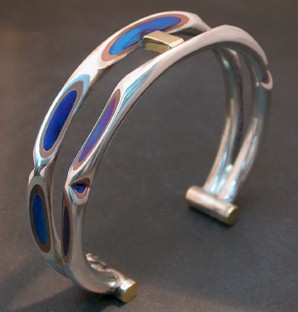
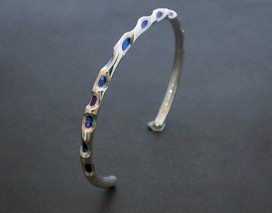 Silver bangle with titanium centre
 |
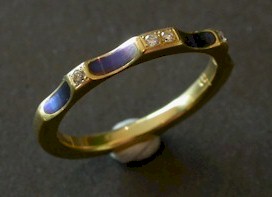 18ct gold ring and titanium centre set with small diamonds. This
ring was drawn round and rolled square in the roller. 18ct gold ring and titanium centre set with small diamonds. This
ring was drawn round and rolled square in the roller. |
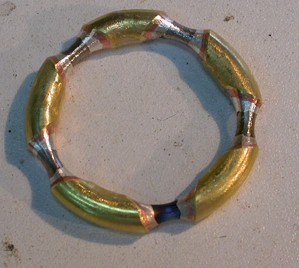
| This bangle, made with titanium, copper, silver and 18 karat
gold, was going to be a watch bangle for myself. In the center I was going
to put a watch casing and all the innards. But what stopped me was
that if I put a watch in the middle of the bangle, I would loose the inner
titanium blue in on the top of the bangle. So I put a piece of 18ct in
instead and later I might set diamonds pave into the gold. In truth, one other thing that made me cautious was that it is friggin' difficult soldering on composite metals like this bangle, so the watch case might or might not have worked. ( refer to' notes on finishing the pendant') Note that all the exposed titanium faces in such a way that it is largely protected by the other metal from wear and tear. |
 |
Follow another Jewelry Teaching Class on Titanium - Wax and Titanium work